Latest Updates:
Welcome To E-MAX COMPUTER EDUCATION PURNEA BRANCH (EMAX/EK13409) (India's Number 1 Computer Education)


Showing posts with label D.T.P.. Show all posts

Wednesday, March 23, 2022

Word 2010 - Formatting Text

Introduction

Lesson 3

To create and design effective documents, you need to know how to format text

In addition to making your document more appealing, formatted text can draw the reader's attention to specific parts of the document and help communicate your message.

In this lesson, you'll learn to format the font size, style, and color; highlight the text; and use the bold, italic, underline, and change case commands.

Formatting text

In Word, you have several options for adjusting the font of your text, including size, color, and inserting special symbols

You can also adjust the alignment of the text to change how it is displayed on the page.

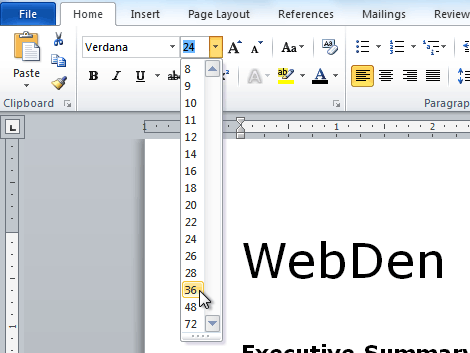
i. How To change the font size:

  1. Select the text you want to modify.
  2. Click the drop-down arrow next to the Font Size box on the Home tab. A drop-down menu appears.
  3. Select the desired font size from the menu. Alternatively, you can type the value you want and then press Enter on your keyboard.

    Changing the font size

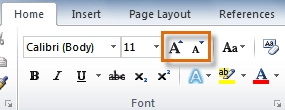
You can also use the Grow Font and Shrink Font commands to change the size.

The Grow Font and Shrink Font commands

ii. How To change the font:

  1. Select the text you want to modify.
  2. Click the drop-down arrow next to the Font box on the Home tab. The Font drop-down menu appears.
  3. Move the mouse pointer over the various fonts. A live preview of the font will appear in the document.
    Changing the font
  4. Select the font you want to use. The font will change in the document.

iii. How To change the font color:

  1. Select the text you want to modify.
  2. Click the Font Color drop-down arrow on the Home tab. The Font Color menu appears.
  3. Move the mouse pointer over the various font colors. A live preview of the color will appear in the document.
    Changing the font color
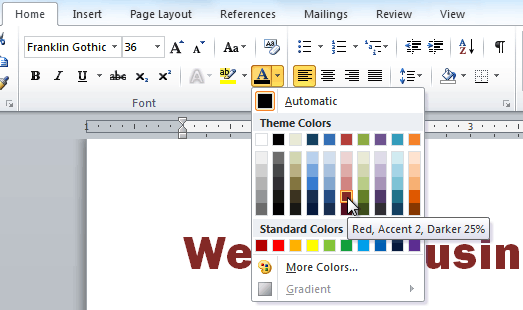
  4. Select the font color you want to use. The font color will change in the document.

Your color choices aren't limited to the drop-down menu that appears. Select More Colors at the bottom of the list to access the Colors dialog box. Choose the color you want, then click OK.

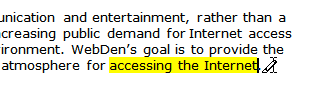
iv. How To highlight text:

  1. From the Home tab, click the Text Highlight Color drop-down arrow. The Highlight Color menu appears.
    Choosing a highlight color
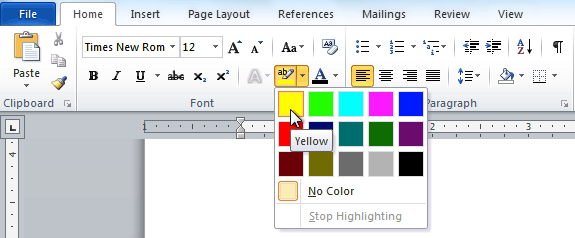
  2. Select the desired highlight color.
  3. Select the text you want to modify. It will then be highlighted.
    Highlighting text
  4. To switch back to the normal cursor, click the Text Highlight Color command.

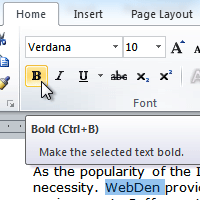
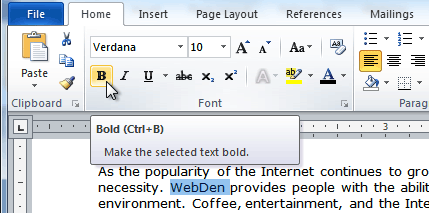
v. How To use the bold, italic, and underline commands:

  1. Select the text you want to modify.
  2. Click the Bold, Italic, or Underline command in the Font group on the Home tab.
    Making text bold

vi. How To change text case:

  1. Select the text you want to modify.
  2. Click the Change Case command in the Font group on the Home tab.
  3. Select the desired case option from the list.
    Changing the text case

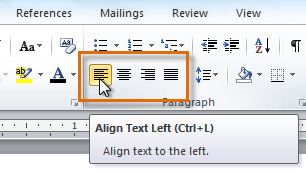
vii. How To change text alignment:

  1. Select the text you want to modify.
  2. Select one of the four alignment options from the Paragraph group on the Home tab.
    • Align Text Left: Aligns all selected text to the left margin
    • Center: Aligns text an equal distance from the left and right margins
    • Align Text Right: Aligns all selected text to the right margin
    • Justify: Aligns text equally on both sides and lines up equally to the right and left margins; used by many newspapers and magazines


Challenge!

  1. Open an existing Word document. If you want, you can use this example.
  2. Change the font size of some text.
  3. Change the font style of some text.
  4. Change the font color of some text.
  5. Try various cases using the Change Case command.
  6. Try the four alignment commands.
  7. Save the document.

Thursday, June 6, 2019

Notepad

Notepad Tutorial

Introduction

Notepad is a handy program that a user can type in text quickly and easily. It is not for publishing a book but more of a scratchpad. This is a tutorial on how to use Notepad.

What will be taught
  • Opening Notepad
  • Saving a document
  • Printing a document
  • Opening an existing document

Open Notepad


To open Notepad click on start > All Programs > accessories > notepad

Click here for a screenshot of Notepad
To enter text, just start typing in Notepad.
If you make a mistake typing you can backspace over it.

Save

To save your work click on File > Save and if you have not saved it before a screen will appear.

Click here for a screenshot of Save dialog
For now, make sure the Encoding is set to ANSI.

Print

To print File > Print...  The three dots after the word Print means there will be another screen that pops up. This is a Windows standard.
Click here for a screenshot of the Print dialog
 Select the printer you wish to print to then click the 'Print' button.

Open

To open an existing notepad document click on File > Open...
Click here for a screenshot of Open dialog
If you have not saved a document you are working on, Notepad will ask you if you want to save it or discard it. The Open window appears (note the word 'open' in the title bar) which allows you to browse to your existing document.
Note the File name has a *.txt which means when you browse for your already created document only notepad type documents (those ending with .txt) will show up in the Open window.

Sunday, November 11, 2018

Word Intro.2

INTRODUCTION MICROSOFT WORD

Microsoft word is an example of word processor and word processor is an application program that allows us to create and edit personal and business documents.
Such as Letters, Resume, Reports, Invoices, Emails, and Books and By default, all Microsoft word documents (Office 2007-2010) saved with the .docx file extension.

Microsoft Word can be used for the following purposes:
1. To create business documents having various graphics including pictures, charts, and diagrams.

2. To store and reuse ready-made content and formatted elements such as cover pages and sidebars.

3. To create letters and letterheads for personal and business purpose.

4. To design different documents such as resumes or invitation cards etc.

RUN COMMAND TO OPEN THE MS-WIRD
Winword

Microsoft Word


In this chapter, we will discuss how to get started with Word 2010. We will understand how to start a Word 2010 application in simple steps. Assuming you have Microsoft Office 2010 installed in your PC.

Practical -1

To start the Word application, follow these steps −

Step 1 − Click the Start button.

Windows Start Button

Step 2 − Click the All Programs option from the menu.

Windows All Programs

Step 3 − Search for Microsoft Office from the submenu and click it.

Microsoft Office 2010

Step 4 − Search for Microsoft Word 2010 from the submenu and click it.

Microsoft Word 2010

This will launch the Microsoft Word 2010 application and you will see the following window.

Word Window

MICROSOFT WORD MENUS


HOME

INSERT

PAGE LAYOUT

REFERENCES

MAILINGS

REVIEW

VIEW

TABLE MENU

SHORTCUT KEYS