Introduction
There are many choices you can make when printing an Excel workbook. You can choose what parts of a workbook to print and how the data fits on the page.
In this lesson, you will learn how to print worksheets, workbooks, and selections of cells. You will also learn how to prepare for printing by modifying page orientation, scale, margins, print titles, and page breaks.
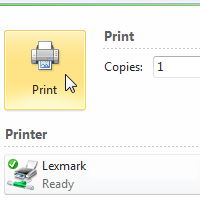
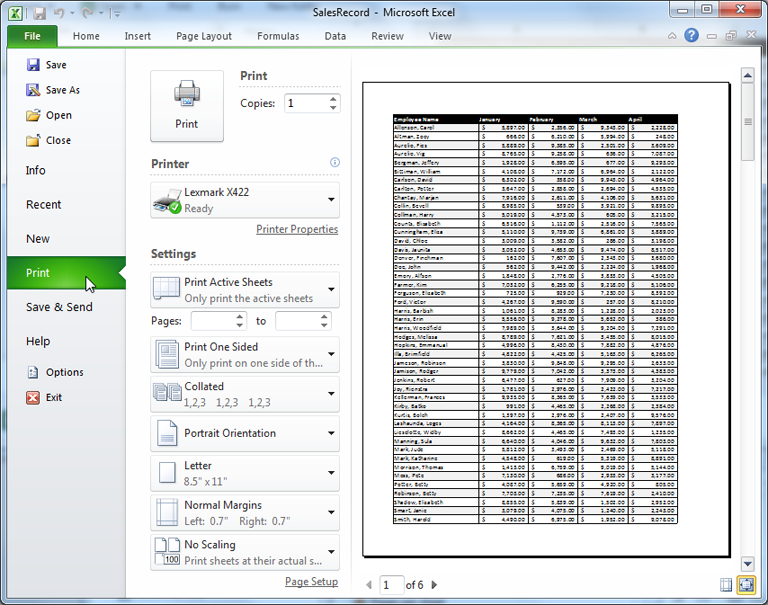
.To view the Print pane:
- Click the File tab. This takes you to Backstage view.
- Select Print. The Print pane appears, with the print settings on the left and Print Preview on the right.
Click the buttons in the interactive below to learn about the Print pane.
To print active sheets:
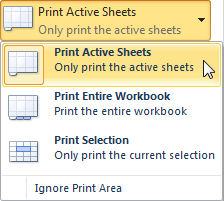
If you have multiple worksheets in your workbook, you'll need to decide if you want to print the entire workbook or specific worksheets. Excel gives you the option to Print Active Sheets. A worksheet is considered active if it is selected.
- Select the worksheets you want to print. To print multiple worksheets, click the first worksheet, hold down the Ctrl key, then click the other worksheets you want to select.

- Click the File tab.
- Select Print to access the Print pane.
- Select Print Active Sheets from the print range drop-down menu.
- Click the Print button.
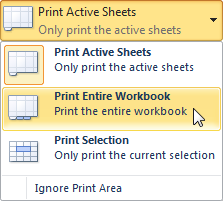
To print the entire workbook:
- Click the File tab.
- Select Print to access the Print pane.
- Select Print Entire Workbook from the print range drop-down menu.
- Click the Print button.
To print a selection or set the print area:
- Select the cells you want to print.
- Click the File tab.
- Select Print to access the Print pane.
- Select Print Selection from the print range drop-down menu.
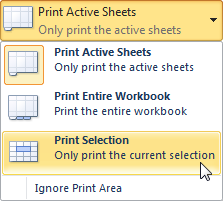
- You can see what your selection will look like on the page in Print Preview.
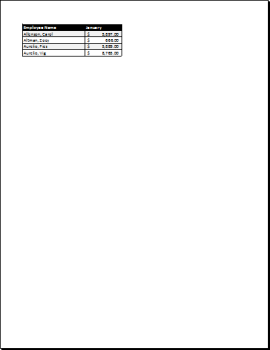
- Click the Print button.
To change page orientation:
- Click the File tab.
- Select Print to access the Print pane.
- Select either Portrait Orientation or Landscape Orientation from the orientation drop-down menu.
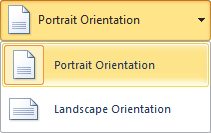
- Your page orientation is changed.

To fit a worksheet on one page:
- Click the File tab.
- Select Print to access the Print pane.
- Select Fit Sheet on One Page from the scaling drop-down menu.
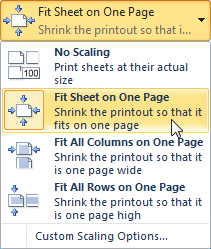
- Your worksheet is reduced in size until it fits on one page. Remember that if it is scaled too small, it might be difficult to read.
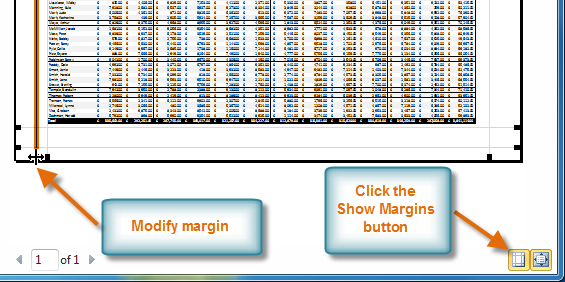
To modify margins while in Print Preview:
The margins of your worksheet may need to be adjusted to make data fit more comfortably on the printed page. You can adjust the margins in Print Preview.
- Click the File tab.
- Select Print to access the Print pane.
- Click the Show Margins button. Your margins will appear.
- Hover your mouse over one of the margin markers
 until the double arrow
  appears.
 - Click and drag the margin to your desired location.
- Release the mouse. The margin is modified.
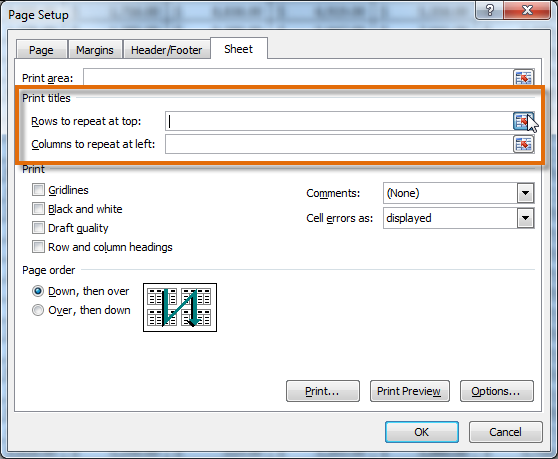
To use print titles:
Imagine how difficult it would be to read a worksheet if the column and row headings only appeared on the first page. The Print Titles command allows you to select specific rows and columns to appear on each page.
- Click the Page Layout tab.
- Select the Print Titles command.
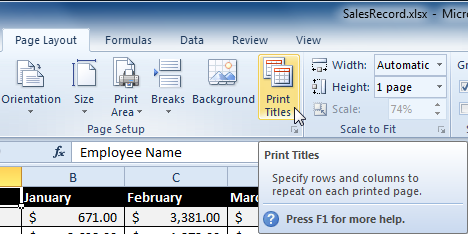
- The Page Setup dialog box appears. Click the icon at the end of the Rows to repeat at top field.
- Your mouse becomes the small selection arrow
 . Click the rows you want to appear on each printed page. The Rows to repeat at top dialog box will record your selection.
- Click the icon at the end of the Rows to repeat at top field.

- Repeat for Columns to repeat at left, if necessary.
- Click OK. You can go to Print Preview to see how each page will look when printed.
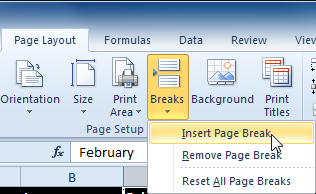
To insert a break:
- Click the Page Layout tab.
- Determine the placement of the break by clicking the row below, cell below, or column to the right of where you want the break to appear. For example, select column C, and a break will appear after column B.
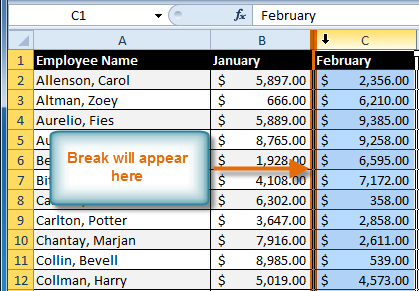
- Select the Insert Page Break command from the Breaks drop-down menu.
- The break is inserted. You can go to Print Preview to confirm that it appears in the correct place on the page.
Challenge!
- Open an existing Excel 2010 workbook. If you want, you can use this example.
- Try printing two active worksheets. If you are using the example, try printing the worksheets labeled 2009 and 2010.
- Try printing only a selection of cells.
- Change the page orientation to landscape.
- Try fitting a large worksheet on one page.
- Try modifying the margins of a worksheet in Print Preview.
- If you are using the example, use the Print Titles command to make row 1 and column A appear on every page.
- Create a page break so only columns A and B appear on one page.
No comments:
Post a Comment